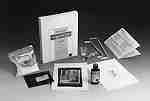

Coating the Paper
There are two main methods of coating the paper, either by brush or glass
rod. I used both methods and found that was little difference in the end
result. The paper should be taped to a sheet of glass to hold it firm while
coating and about 0.5ml of the sensitizer is dispensed along the paper at
the width that the print will be. The glass rod is laid on to the sensitizer
and then drawn down the paper to the length that the print will be. This
action is repeated several times until the sensitizer is used and is smooth
across the whole area covered. It is recommended that an area slightly larger
than the final print size be covered in this way. When using the brush to
lay on the sensitizer the end result will be the same but the edges can
be left uneven, which seems to be fashionable these days. The paper is then
dried either by air or using some form of heater or even a hair dryer.
The Negative
Because exposure is by contact it is necessary to use a larger format negative
and never an original. Therefore, you will need to make a fairly contrasty
copy negative from any size original because the Argyrotype is a very soft
process. The instructions give various methods of doing this which are not
too difficult or expensive. I have used both Kodak Direct Duplicating Film,
which is quite expensive, and lith positive contact printed on to Ilford
Delta Pro 100, which is relatively inexpensive. The resulting negatives
were used for this test and I am happy with the results from both methods.
Making The Print
The negative is put into contact with the dried sensitised paper using a
contact printing frame or if this is not available, a clip frame which can
be obtained from a local art shop.
It is essential that the paper and the negative are held in firm close
contact during the whole exposure time. To make the exposure the frame is
then either laid on an ultra violet light box or just laid in the sun during
which time it is necessary to inspect the image to gauge the correct exposure.
This is quite easily done for the sensitizer gets darker with more exposure
and the image can be seen through the glass of the frame. Clearly, the first
few exposures are a matter of guesswork but you will soon be able to judge
times dependent on the density of the negative. Generally, I found that
the sun was about twice as fast as my ultra violet light box which has six
15 watt tubes as a light source and takes about 12 to 15 minutes to give
enough exposure.
Development, fixing & washing
Once exposed the paper is then placed into plain running water for about
5 minutes although I have used trays and given two or three changes. This
is followed by a 3 minute immersion in the fixing bath and finally a 30
minute wash. The print can then be dried at room temperature or by applying
heat from a dryer or fan heater.
The Results I made prints using both methods of exposure and feel that the
sun prints appear to be crisper and a warmer brown in addition to being
shorter exposures which I have already mentioned. I also coated the paper
using both brush and the rod method and obtained identical results in that
the sensitizer was equally smooth and no brush marks were evident in the
final print other than the ragged edges around the image. Clearly, if brush
strokes are desired in the final print that would be easily achieved simply
by omitting to smooth the final coat in one direction which is the method
that I chose to use.
Once a print has been washed it is possible to tone it using blue or sepia
or most other toners on the market. I toned one in Fotospeed Blue Toner
which works very well. As with all toning it is necessary to experiment
with all combinations to find a result that you like.
Toning and Contrast Comparisons
UV Lightbox Example
Brush Application
Recommended Technique
Making prints using old processes is fun and can be very creative. Expensive
equipment is not required if, for example you do not use a light box and
rely on the sun. Beware of this though as you may well limit your opportunities
of making prints to the 15 to 20 days of sun that we get each year. Some
of my prints could be described as sun/rain prints as it did rain during
one session that I had. Seriously, you do not need direct sunlight, only
the ultra violet part of daylight is required to make prints.
In addition to the Argyrotype kit, Fotospeed plan to manufacture a number
of old processes including, Cyanotype, Platinum and Palladium. I will look
forward to experimenting with them and hopefully emulating some of the old
masters who made some of the most outstanding images in the history of photography
when using the old processes.
Les McLean
Return to Photon June 96 Contents